Find Space
Find a Location
Partners
Resources
GBP
020 3808 7222
Enquire Now
Office Type
Price
Desks
Amenities
Sale
Home
United Kingdom
whetstone
Office Space in whetstone
415 Office Spaces for Lease in Whetstone, , United Kingdom
Showing 1 - 40 out of 415 spaces
Sort by: Best Match
Previous slide
Next slide
Compare
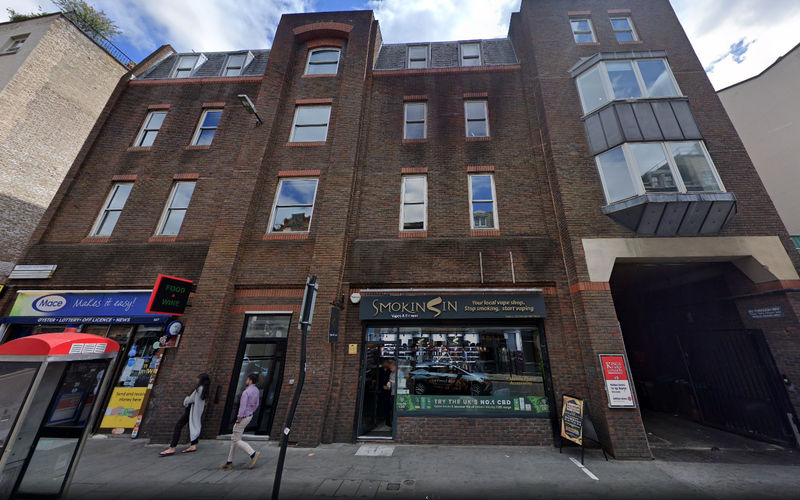
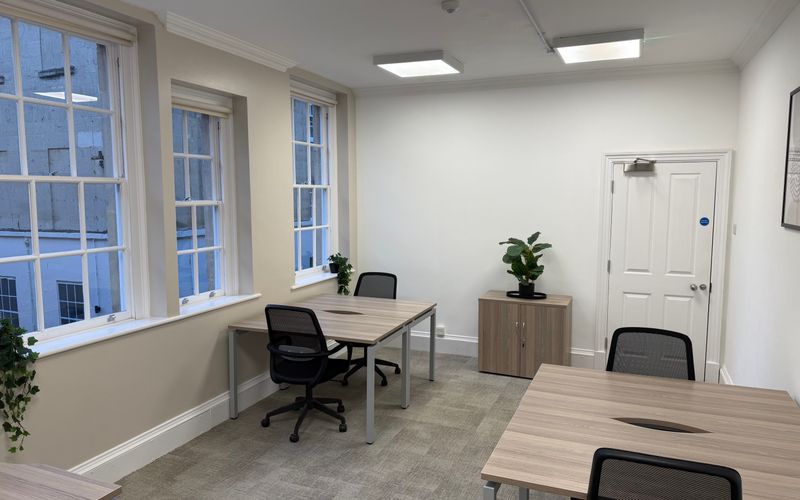
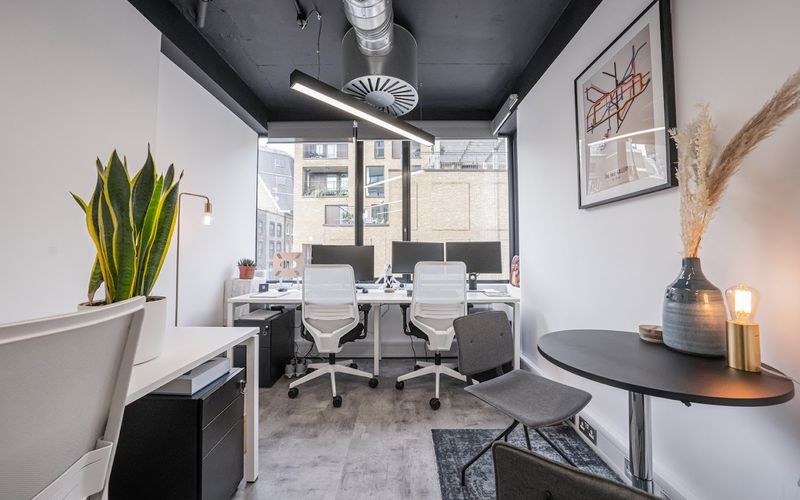
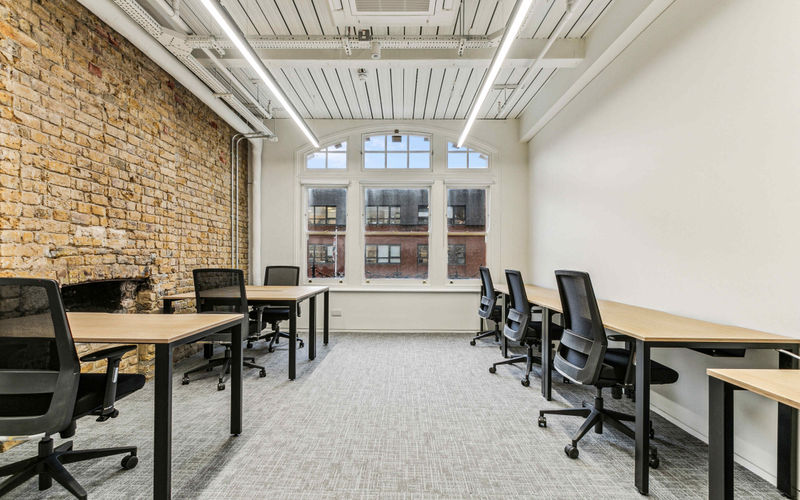
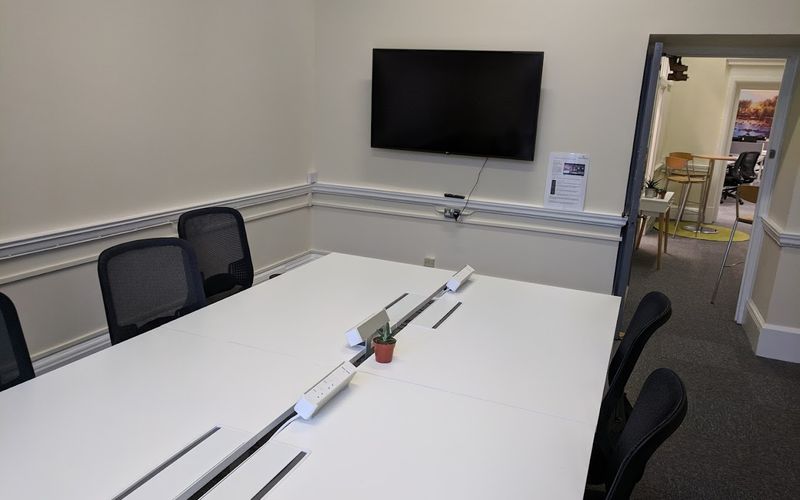
Wesley House
Bull Hill, Leatherhead Surrey
1 DESK
COWORKING
(B) North Street (Stop R) • 2 mins walk
(T) Leatherhead • 6 mins walk
£300
/mo
9 other options (1-6 desks)
Enquire
Previous slide
Next slide
Compare
The Nest Co-Working Space
2-4 Sampson Street, Greater London
1 DESK
COWORKING
(B) Sampson Street • 1 mins walk
(T) Wapping • 7 mins walk
£222
/mo
8 other options (1-50 desks)
Enquire
Previous slide
Next slide
Compare
Broxhead House
60 Barbados Rd, Bordon
1 DESK
COWORKING
(B) The Phoenix Theatre • 4 mins walk
(T) Bentley • 90 mins walk
£185
/mo
5 other options (1-5 desks)
Enquire
Previous slide
Next slide
Compare
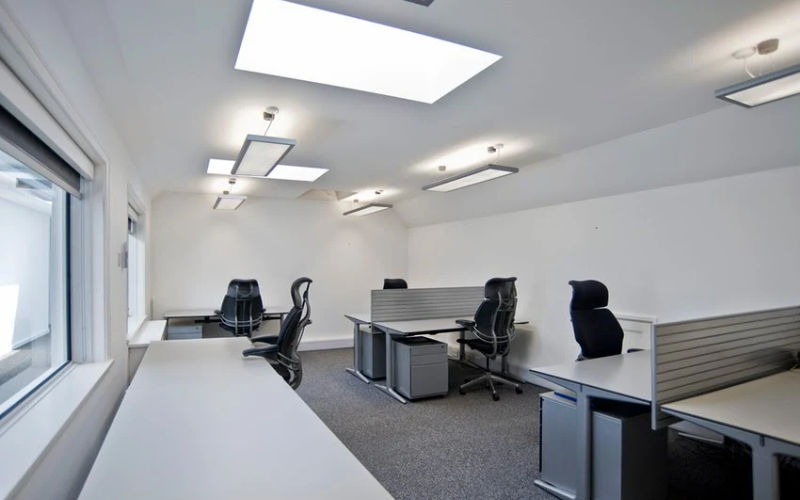
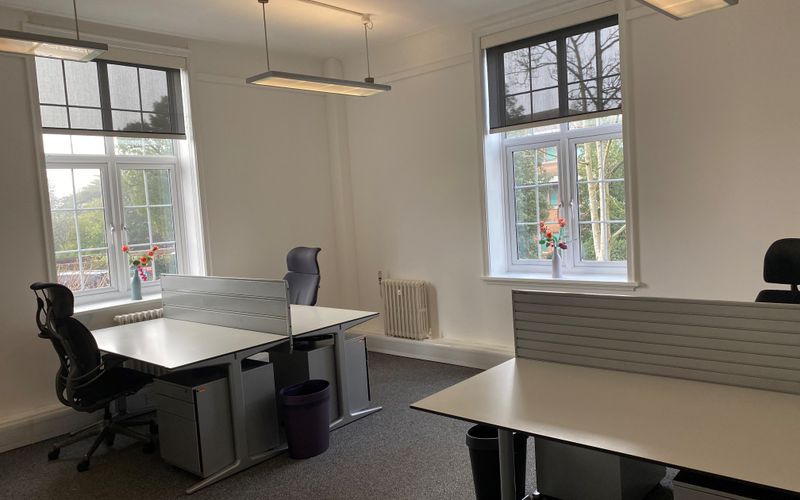
The Cottage
Marine Walk Street, Hythe
1 DESK
COWORKING
(B) Old Prospect Road • 1 mins walk
(T) Hythe • 12 mins walk
£150
/mo
3 other options (1-3 desks)
Enquire
Previous slide
Next slide
Compare
Avenue Business Park
Unit 4, Avenue Business Park Justin Road, Greater London
1 DESK
COWORKING
(B) Trinity Park • 4 mins walk
(T) Highams Park • 32 mins walk
£200
/mo
3 other options (1-8 desks)
Enquire
Previous slide
Next slide
Compare
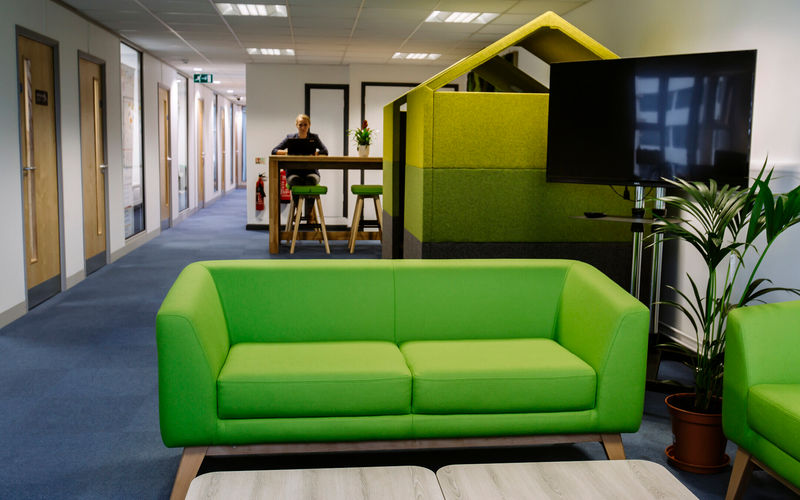
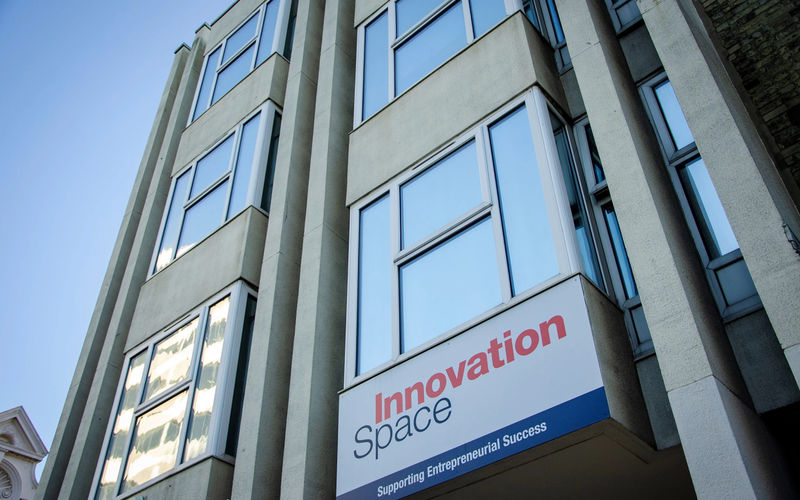
Innovation Connect - Halpern House
Hampshire Terrace, Portamouth
1 DESK
COWORKING
(B) University of Portsmouth • 2 mins walk
(T) Portsmouth & Southsea • 9 mins walk
£95
/mo
10 other options (1-10 desks)
Enquire
Previous slide
Next slide
Compare
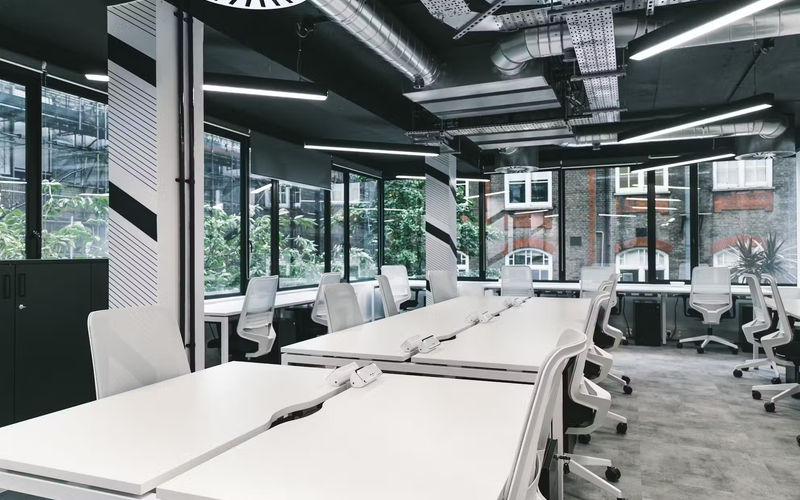
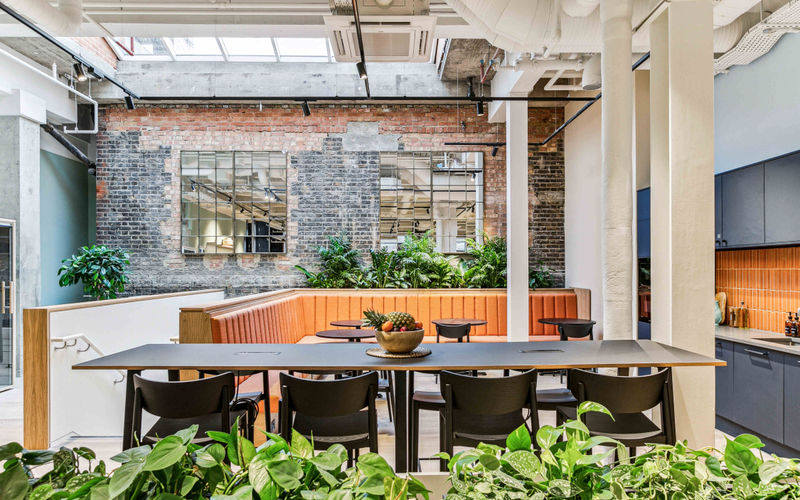
Corn House
Marshgate Lane, London
6 DESKS
COWORKING
(B) Pudding Mill Lane • 5 mins walk
(T) Hackney Wick • 16 mins walk
£1,200
/mo
24 other options (1-85 desks)
Enquire
Previous slide
Next slide
Compare
Three Tuns House
109 Borough High Street, Borough
5 DESKS
COWORKING
(B) The Hop Exchange • 3 mins walk
(T) Borough • 5 mins walk
£3,245
/mo
5 other options (1-16 desks)
Enquire
Previous slide
Next slide
Compare
Together Workspace
8 Freckleton Street, Kirkham
1 DESK
COWORKING
(B) Market Square • 2 mins walk
(T) Kirkham & Wesham • 15 mins walk
£192
/mo
1 other options (1-1 desks)
Enquire
Previous slide
Next slide
10% OFF
Compare
Kingfisher Shopping Centre
Walford Walk, Redditch
1 DESK
COWORKING
(B) Trafford Park • 11 mins walk
(T) Redditch • 14 mins walk
£136
/mo
was £151 /mo
Enquire
Previous slide
Next slide
Compare
Innovation Connect - Halpern House
Hampshire Terrace, Portamouth
2 DESKS
COWORKING
(B) University of Portsmouth • 2 mins walk
(T) Portsmouth & Southsea • 9 mins walk
£190
/mo
10 other options (1-10 desks)
Enquire
Previous slide
Next slide
Compare
4 Queen Street
4 Queen Street, Bath And North East Somerset
1 DESK
COWORKING
(B) Queen Square • 1 mins walk
(T) Bath Spa • 9 mins walk
£249
/mo
4 other options (1-20 desks)
Enquire
Previous slide
Next slide
Compare
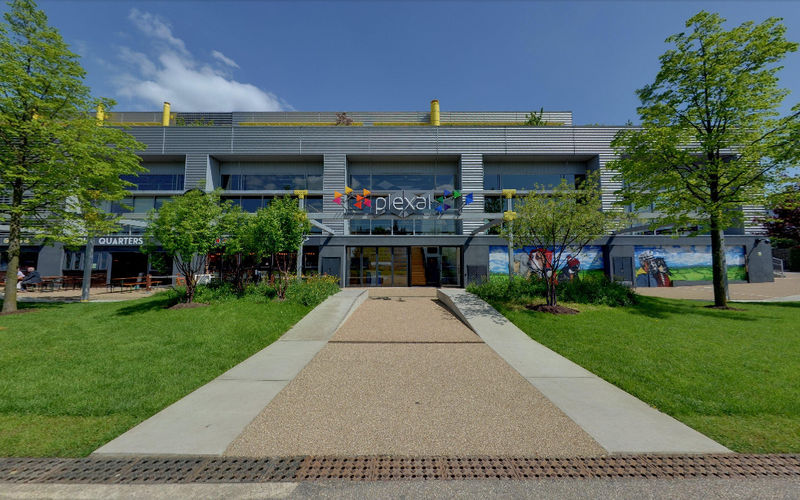
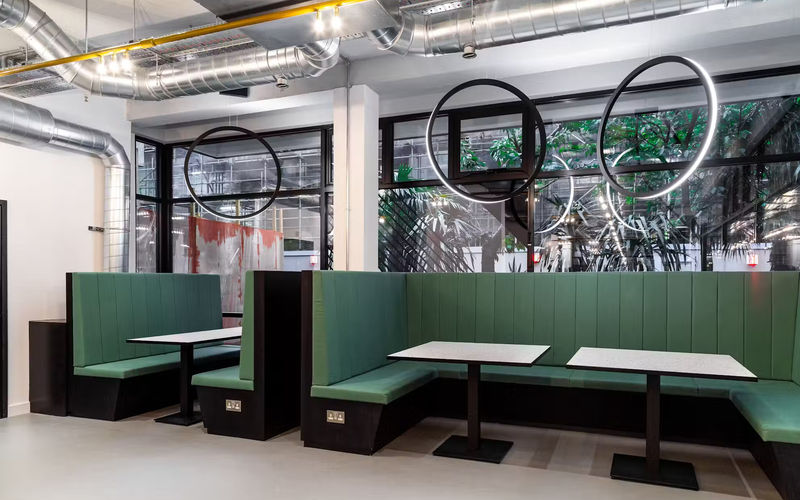
Plexal - The Press Centre
14 Here East, London
1 DESK
COWORKING
(B) Here East • 2 mins walk
(T) Hackney Wick • 10 mins walk
£240
/mo
5 other options (1-18 desks)
Enquire
Previous slide
Next slide
Compare
Corn House
Marshgate Lane, London
30 DESKS
COWORKING
(B) Pudding Mill Lane • 5 mins walk
(T) Hackney Wick • 16 mins walk
£6,000
/mo
24 other options (1-85 desks)
Enquire
Previous slide
Next slide
Compare
Clarendon WRX
Clarendon Road, Hertfordshire
1 DESK
COWORKING
(B) Watford Clarendon Road • 1 mins walk
(T) Watford Junction • 7 mins walk
£300
/mo
24 other options (1-32 desks)
Enquire
Previous slide
Next slide
Compare
Ingestre Place
44 Ingestre Place, Soho
1 DESK
COWORKING
(B) Trocadero / Haymarket (Stop K) • 4 mins walk
(T) Piccadilly Circus Station • 6 mins walk
£420
/mo
4 other options (1-4 desks)
Enquire
Previous slide
Next slide
Compare
Innovation Connect - Halpern House
Hampshire Terrace, Portamouth
6 DESKS
COWORKING
(B) University of Portsmouth • 2 mins walk
(T) Portsmouth & Southsea • 9 mins walk
£570
/mo
10 other options (1-10 desks)
Enquire
Previous slide
Next slide
Compare
The Nest Co-Working Space
2-4 Sampson Street, Greater London
2 DESKS
COWORKING
(B) Sampson Street • 1 mins walk
(T) Wapping • 7 mins walk
£444
/mo
8 other options (1-50 desks)
Enquire
Previous slide
Next slide
Compare
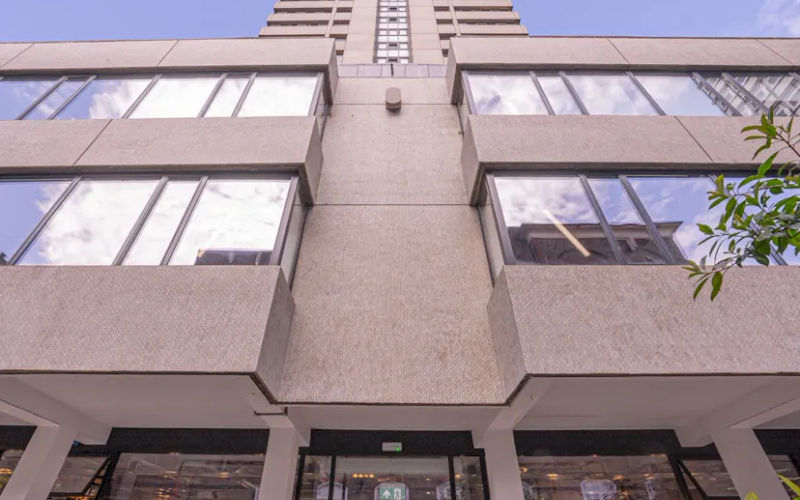
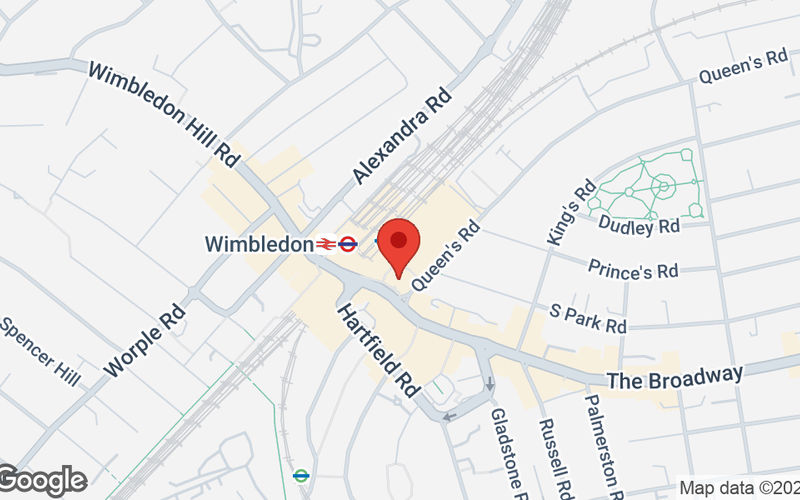
Huddle Wimbledon
4 Queens Road, London
3 DESKS
COWORKING
(B) Queens Road Car Park • 1 mins walk
(T) Wimbledon • 5 mins walk
£1,350
/mo
9 other options (1-12 desks)
Enquire
Previous slide
Next slide
Compare
Earl Street
Earl Street, Coventry
1 DESK
COWORKING
(B) Magistrates Court (Stop LP1) • 1 mins walk
(T) Coventry • 13 mins walk
£179
/mo
1 other options (1-1 desks)
Enquire
Previous slide
Next slide
Compare
Bournemouth Aviation Park West
Target Road, Christchurch
6 DESKS
COWORKING
(B) Commercial Road • 7 mins walk
(T) Pokesdown • 116 mins walk
£540
/mo
20 other options (1-20 desks)
Enquire
Previous slide
Next slide
Compare
Spectrum
Spectrum Bond Street, Bristol
5 DESKS
COWORKING
(B) Cabot Circus (S1) • 1 mins walk
(T) Montpelier • 19 mins walk
£1,875
/mo
20 other options (1-21 desks)
Enquire
Previous slide
Next slide
Compare
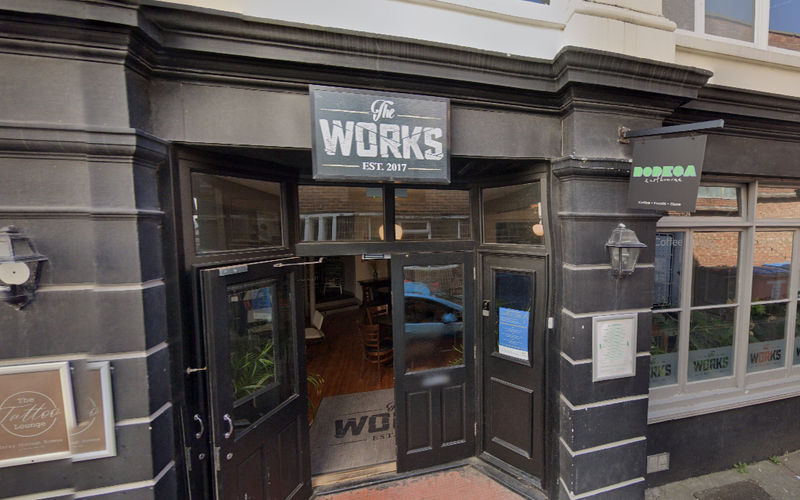
The Works
12 Station St, Eastbourne
1 DESK
COWORKING
(B) Gildredge Road (Stop G1) • 1 mins walk
(T) Eastbourne • 2 mins walk
£95
/mo
9 other options (1-4 desks)
Enquire
Previous slide
Next slide
Compare
Bournemouth Aviation Park West
Target Road, Christchurch
2 DESKS
COWORKING
(B) Commercial Road • 7 mins walk
(T) Pokesdown • 116 mins walk
£180
/mo
20 other options (1-20 desks)
Enquire
Previous slide
Next slide
Compare
The Granary
N/a Dartington, Dartington Hall
24 DESKS
COWORKING
(B) Dartington Hall • 1 mins walk
(T) Totnes • 25 mins walk
£4,200
/mo
5 other options (1-50 desks)
Enquire
Previous slide
Next slide
Compare
Reliance Wharf
Reliance Wharf, London
8 DESKS
COWORKING
(B) Laburnum Street (Stop KD) • 3 mins walk
(T) Haggerston • 6 mins walk
£2,352
/mo
10 other options (1-10 desks)
Enquire
Previous slide
Next slide
10% OFF
Compare
Jubilee House,
Third Avenue, Marlow
1 DESK
COWORKING
(B) Marlow • 7 mins walk
(T) Marlow • 10 mins walk
£178
/mo
was £198 /mo
Enquire
Previous slide
Next slide
Compare
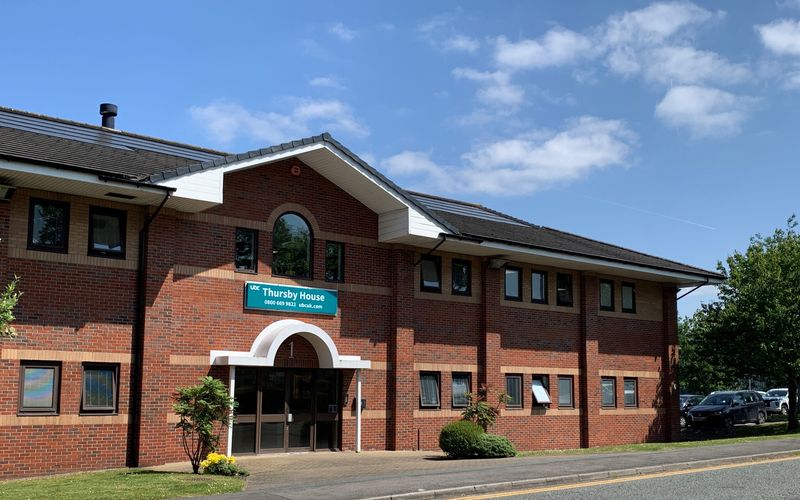
Thursby House
1 Thursby Road, Birkenhead
4 DESKS
COWORKING
(B) Bromborough Retail Park • 3 mins walk
(T) Bromborough Rake • 18 mins walk
£800
/mo
10 other options (1-7 desks)
Enquire
Previous slide
Next slide
Compare
Winckley Square
33-34 Winckley Square, Preston
1 DESK
COWORKING
(B) Preston Railway Station • 6 mins walk
(T) Preston • 6 mins walk
£195
/mo
5 other options (1-5 desks)
Enquire
Previous slide
Next slide
Compare
Thursby House
1 Thursby Road, Birkenhead
1 DESK
COWORKING
(B) Bromborough Retail Park • 3 mins walk
(T) Bromborough Rake • 18 mins walk
£200
/mo
10 other options (1-7 desks)
Enquire
Previous slide
Next slide
Compare
Tramshed Tech Palace
156 High Street Prince Of Wales Road, Swansea
2 DESKS
COWORKING
(B) Dyfatty • 2 mins walk
(T) Swansea • 3 mins walk
£166
/mo
3 other options (1-3 desks)
Enquire
Previous slide
Next slide
Sign 12 get 2 months FREE
Compare
Club Quarters
Trafalgar Square, Greater London
1 DESK
COWORKING
(B) Trafalgar Square / Charing Cross Stn (Stop D) • 2 mins walk
(T) Charing Cross • 3 mins walk
£68
/mo
was £150 /mo
Enquire
Previous slide
Next slide
Compare
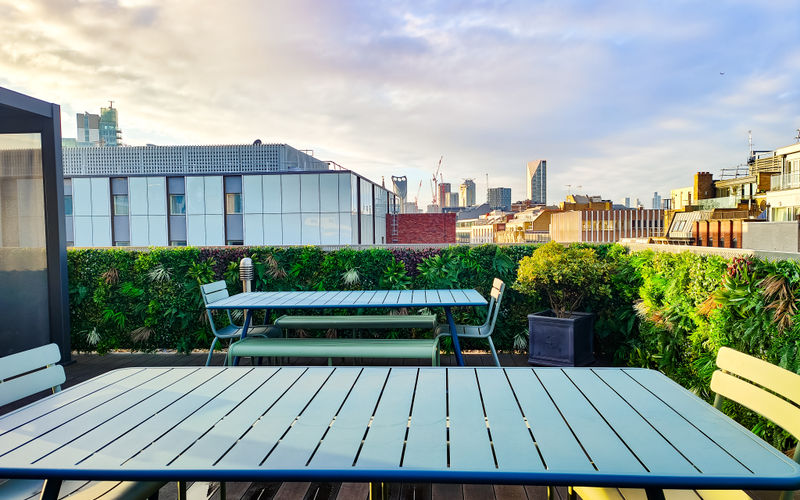
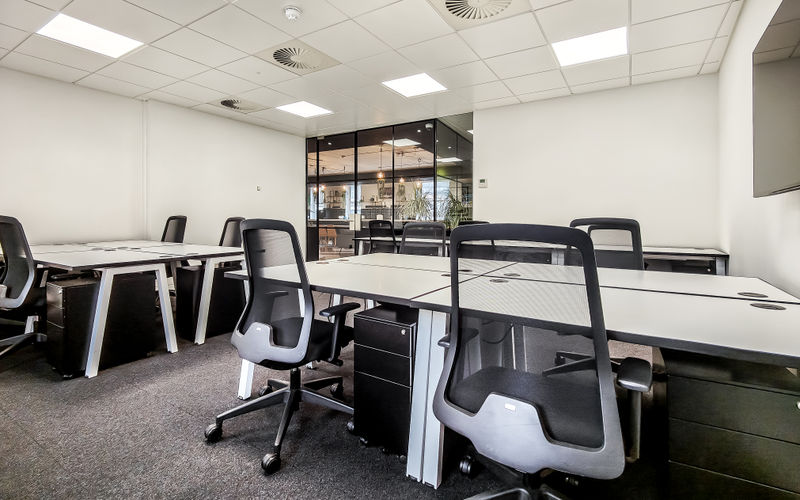
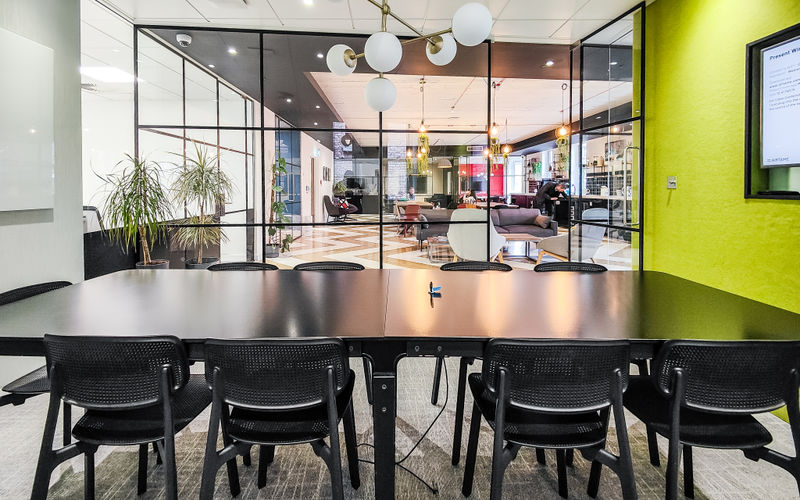
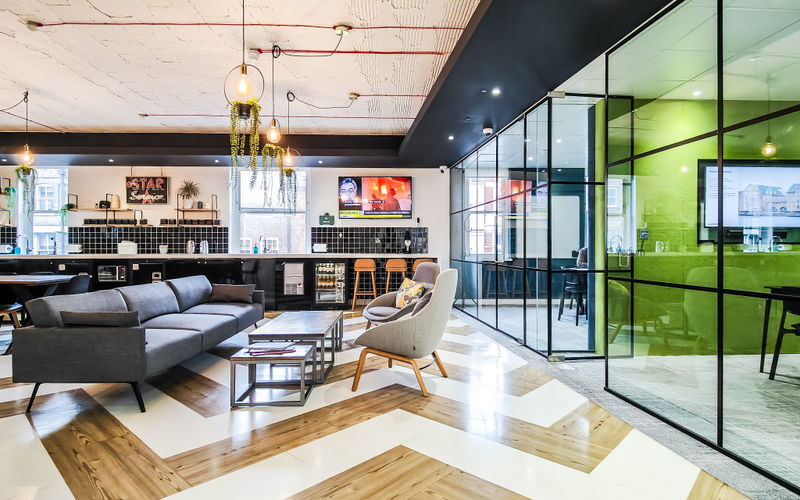
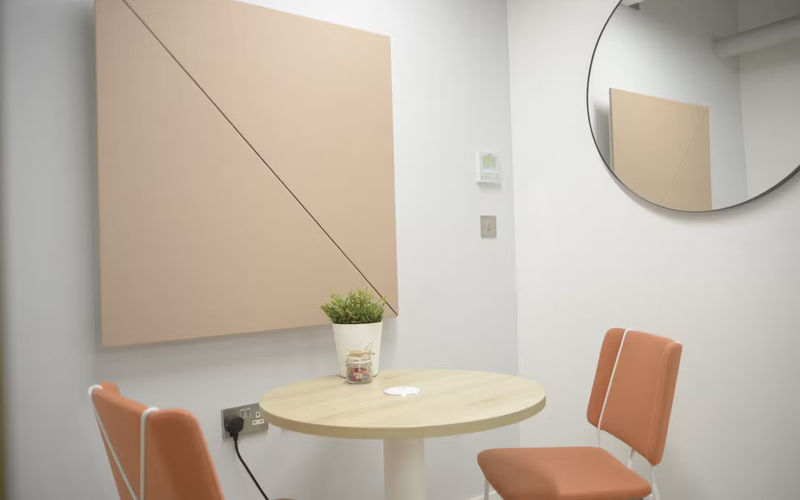
Spaces Euston Road
307 Euston Road, London Nw1 3ad
1 DESK
COWORKING
(B) Warren Street Station (Stop KA) • 4 mins walk
(T) Warren Street • 1 mins walk
£309
/mo
1 other options (1-1 desks)
Enquire
Previous slide
Next slide
Compare
HasleWorks
2-4 Petworth Road, Haslemere
3 DESKS
COWORKING
(B) Town Hall • 2 mins walk
(T) Haslemere • 10 mins walk
£900
/mo
3 other options (1-4 desks)
Enquire
Previous slide
Next slide
Compare
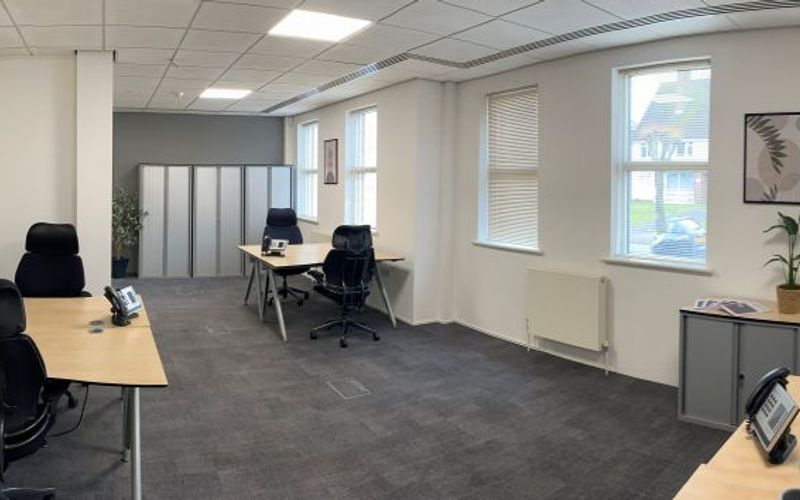
Regent House
13-15 George Street, Buckinghamshire
1 DESK
COWORKING
(B) Granville Street Church • 2 mins walk
(T) Aylesbury (AYS) • 5 mins walk
£210
/mo
4 other options (1-12 desks)
Enquire
Previous slide
Next slide
Compare
Bournemouth Aviation Park West
Target Road, Christchurch
19 DESKS
COWORKING
(B) Commercial Road • 7 mins walk
(T) Pokesdown • 116 mins walk
£1,710
/mo
20 other options (1-20 desks)
Enquire
Previous slide
Next slide
Compare
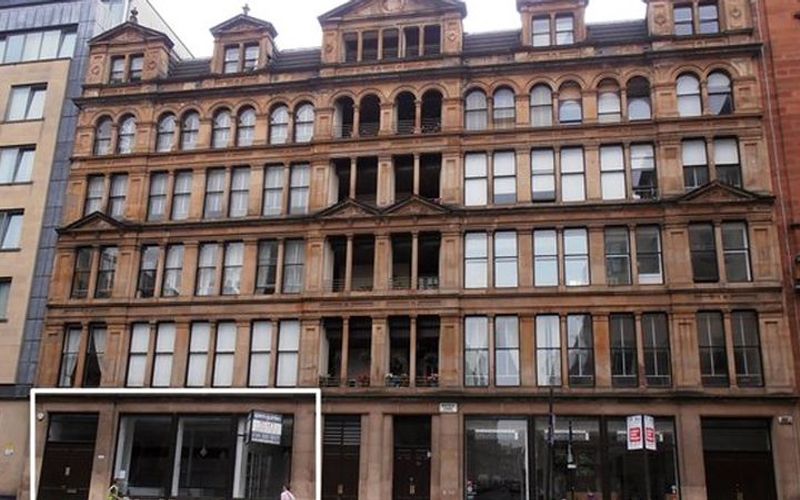
22 Montrose Street
22 Montrose Street, Glasgow
3 DESKS
COWORKING
(B) John Street • 1 mins walk
(T) High Street • 6 mins walk
£675
/mo
5 other options (1-5 desks)
Enquire
Previous slide
Next slide
Compare
Saltash Studios
24 Fore Street, Saltash
1 DESK
COWORKING
(B) Fore Street Bottom • 2 mins walk
(T) Saltash • 4 mins walk
£156
/mo
3 other options (1-3 desks)
Enquire
Previous slide
Next slide
Compare
Reliance Wharf
Reliance Wharf, London
1 DESK
COWORKING
(B) Laburnum Street (Stop KD) • 3 mins walk
(T) Haggerston • 6 mins walk
£294
/mo
10 other options (1-10 desks)
Enquire
Previous slide
Next slide
Compare
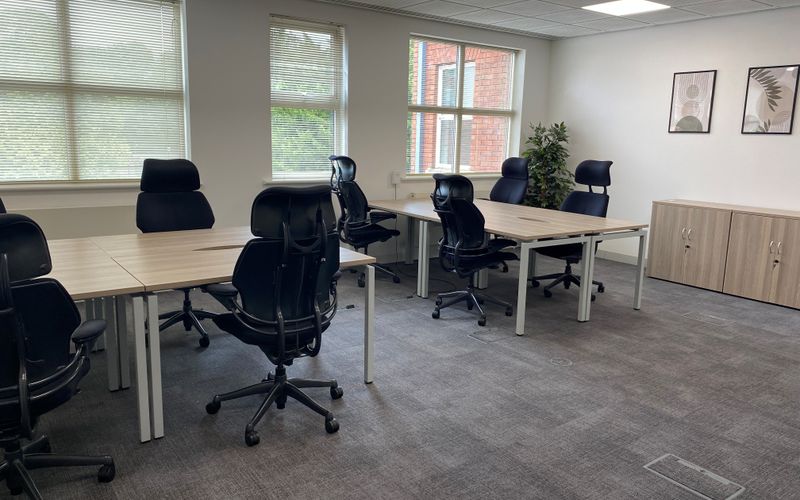
Forward House
17 High Street, Henley-in-arden
4 DESKS
COWORKING
(B) Three Tuns • 4 mins walk
(T) Henley-in-Arden • 10 mins walk
£249
/mo
8 other options (1-10 desks)
Enquire
Previous
1
2
More pages
11
Next


-England-Leatherhead-Surrey-Bull-Hill-3134930.jpg)


-England-Bordon-60-Barbados-RD-4015430.jpg)


-London-London-10-Marshgate-Lane-1923500.jpg)


-London-Borough-109-Borough-High-Street-2204438.jpg)


-Redditch-Redditch-Walford-Walk-4102988.jpg)


-England-Bath-4-Queen-Street-3976933.jpg)


-England-London-14-Here-East-3865818.jpg)


-England-Hertfordshire-Clarendon-Road-3897642.jpg)


-London-Soho-44-Ingestre-Place-864278.jpg)


-Warwickshire-Coventry-Earl-Street-1414319.jpg)


-England-East-Parley-Target-Road-3854569.jpg)


-Bristol-Saint-Pauls-Bond-Street-3989967.jpg)


-Eastbourne-Eastbourne-12-Station-St-4009108.jpg)


-Buckinghamshire-Marlow-Third-Avenue-3801440.jpg)
-Buckinghamshire-Marlow-Third-Avenue-3801439.jpg)


-England-Birkenhead-1-Thursby-Road-1571895.jpg)


-United-Kingdom-London-NW1-3AD-307-Euston-Road-1540233.jpg)
-United-Kingdom-London-NW1-3AD-307-Euston-Road-1540234.jpg)
-United-Kingdom-London-NW1-3AD-307-Euston-Road-1540240.jpg)
-United-Kingdom-London-NW1-3AD-307-Euston-Road-1540237.jpg)
-United-Kingdom-London-NW1-3AD-307-Euston-Road-1540238.jpg)
-United-Kingdom-London-NW1-3AD-307-Euston-Road-1540236.jpg)
-United-Kingdom-London-NW1-3AD-307-Euston-Road-1540235.jpg)
-United-Kingdom-London-NW1-3AD-307-Euston-Road-1540239.jpg)
-United-Kingdom-London-NW1-3AD-307-Euston-Road-1540232.jpg)
-United-Kingdom-London-NW1-3AD-307-Euston-Road-1540601.jpg)


-England-Haslemere-2-4-Petworth-Road-1971997.jpg)
-England-Haslemere-2-4-Petworth-Road-1971993.jpg)
-England-Buckinghamshire-13-15-George-Street-1954387.jpg)
-England-Buckinghamshire-13-15-George-Street-1954380.jpg)
-England-Buckinghamshire-13-15-George-Street-1954379.jpg)
-England-Buckinghamshire-13-15-George-Street-1954390.jpg)
-England-Buckinghamshire-13-15-George-Street-1954384.jpg)
-England-Buckinghamshire-13-15-George-Street-1954381.jpg)
-England-Buckinghamshire-13-15-George-Street-1954439.jpg)
-England-Buckinghamshire-13-15-George-Street-1954457.jpg)


-Warwickshire-Henley-in-Arden-17-High-Street-1088609.jpg)