Find Space
Find a Location
Partners
Resources
GBP
020 3808 7222
Enquire Now
Office Type
Price
Desks
Amenities
Sale
Home
United Kingdom
newport
Office Space in newport
415 Office Spaces for Lease in Newport, , United Kingdom
Showing 1 - 40 out of 415 spaces
Sort by: Best Match
Previous slide
Next slide
Compare
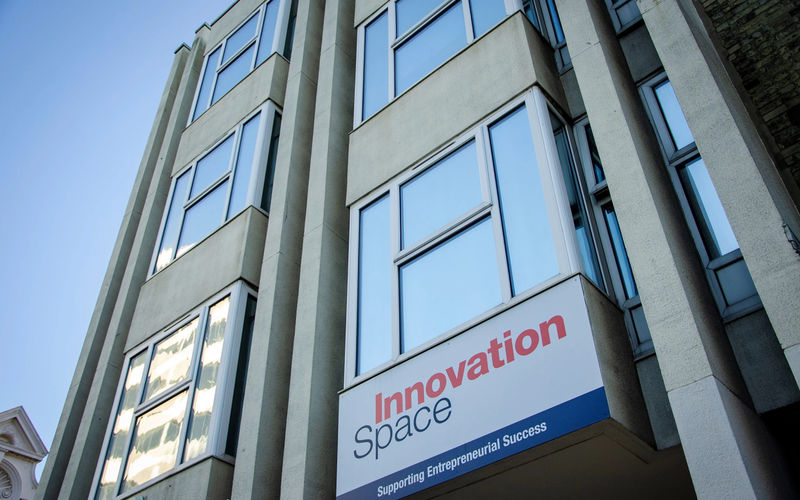
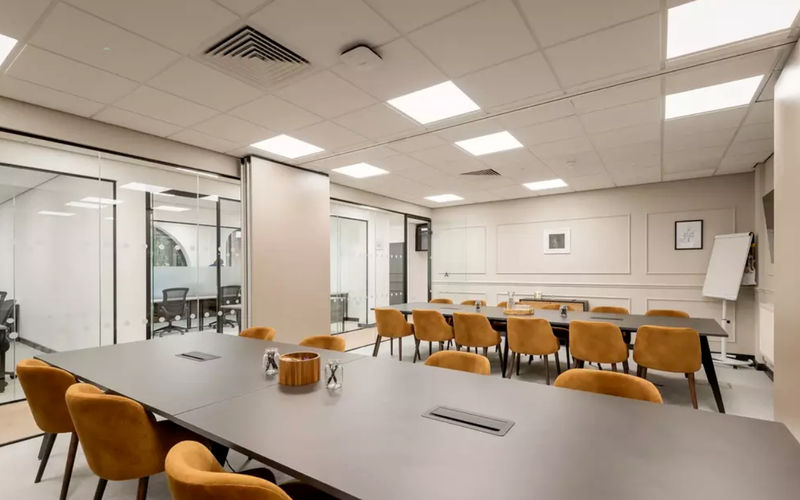
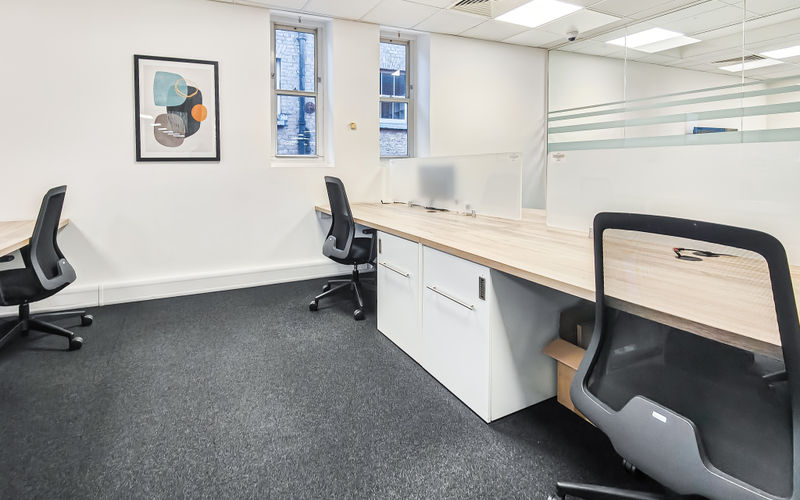
Innovation Connect - Halpern House
Hampshire Terrace, Portamouth
3 DESKS
COWORKING
(B) University of Portsmouth • 2 mins walk
(T) Portsmouth & Southsea • 9 mins walk
£285
/mo
10 other options (1-10 desks)
Enquire
Previous slide
Next slide
Compare
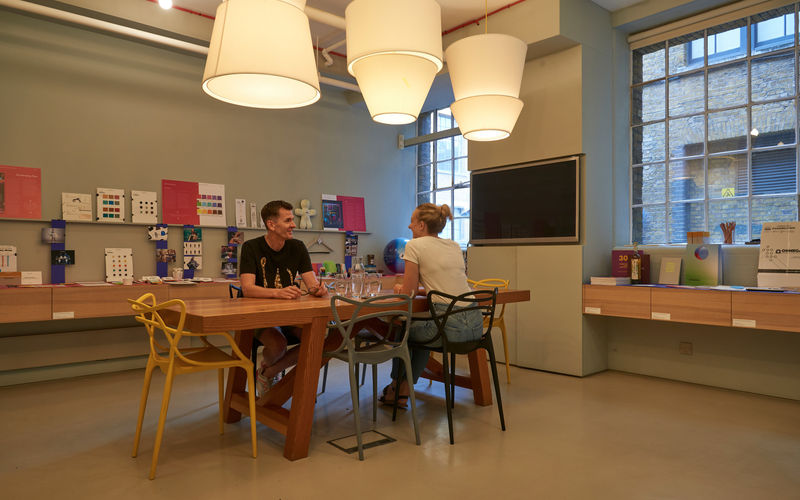
Waterside
44-48 Wharf Road, London
1 DESK
COWORKING
(B) Murray Grove (Stop PH) • 6 mins walk
(T) Angel • 12 mins walk
£350
/mo
3 other options (1-12 desks)
Enquire
Previous slide
Next slide
Compare
The Nest Co-Working Space
2-4 Sampson Street, Greater London
50 DESKS
COWORKING
(B) Sampson Street • 1 mins walk
(T) Wapping • 7 mins walk
£21,750
/mo
8 other options (1-50 desks)
Enquire
Previous slide
Next slide
Compare
Clarendon WRX
Clarendon Road, Hertfordshire
1 DESK
COWORKING
(B) Watford Clarendon Road • 1 mins walk
(T) Watford Junction • 7 mins walk
£300
/mo
24 other options (1-32 desks)
Enquire
Previous slide
Next slide
Compare
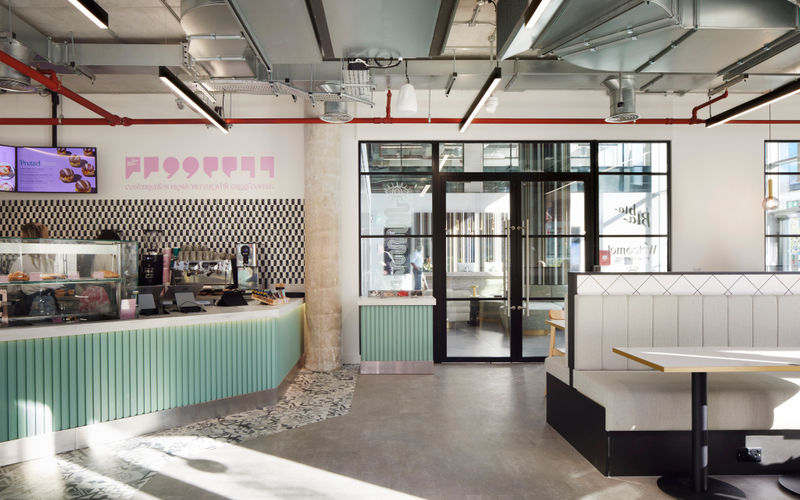
Arca Building
55 Temple Row, Birmingham
27 DESKS
COWORKING
(B) Corporation Street • 1 mins walk
(T) Birmingham Snow Hill • 5 mins walk
£10,665
/mo
4 other options (1-27 desks)
Enquire
Previous slide
Next slide
10% off on 4 months
Compare
225 Denby Dale Road
225 Denby Dale Road, West Yorkshire
1 DESK
COWORKING
(B) Denby Dale Road Bizspace • 1 mins walk
(T) Wakefield Kirkgate • 23 mins walk
£147
/mo
was £163 /mo
Enquire
Previous slide
Next slide
Compare
Bournemouth Aviation Park West
Target Road, Christchurch
14 DESKS
COWORKING
(B) Commercial Road • 7 mins walk
(T) Pokesdown • 116 mins walk
£1,260
/mo
20 other options (1-20 desks)
Enquire
Previous slide
Next slide
Compare
Broxhead House
60 Barbados Rd, Bordon
5 DESKS
COWORKING
(B) The Phoenix Theatre • 4 mins walk
(T) Bentley • 90 mins walk
£925
/mo
5 other options (1-5 desks)
Enquire
Previous slide
Next slide
Compare
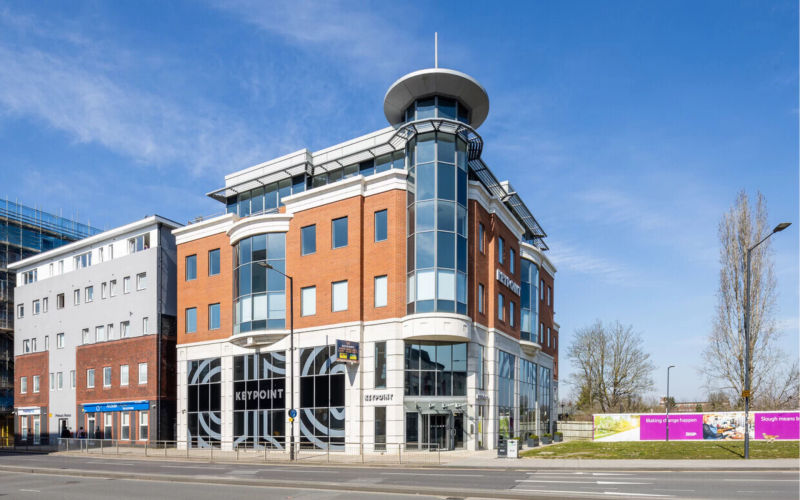
Keypoint
17-23 High Street, Slough
1 DESK
COWORKING
(B) Library (Stop Y) • 1 mins walk
(T) Slough • 7 mins walk
£150
/mo
4 other options (1-30 desks)
Enquire
Previous slide
Next slide
Compare
Innovation Connect - Halpern House
Hampshire Terrace, Portamouth
1 DESK
COWORKING
(B) University of Portsmouth • 2 mins walk
(T) Portsmouth & Southsea • 9 mins walk
£95
/mo
10 other options (1-10 desks)
Enquire
Previous slide
Next slide
Compare
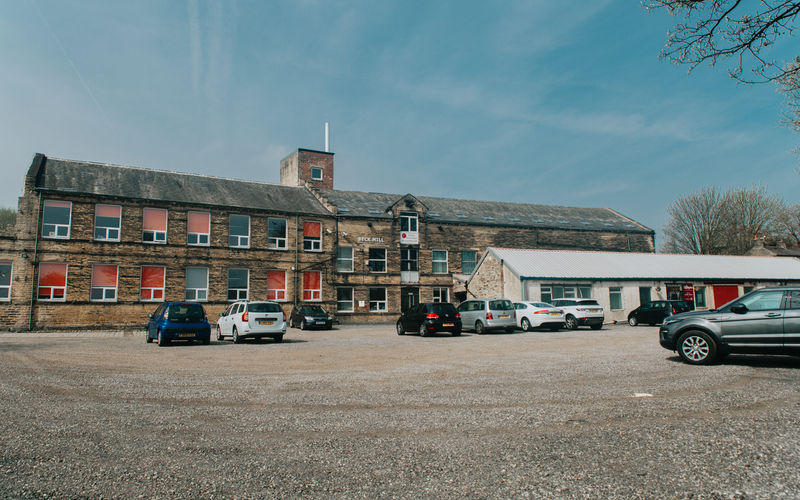
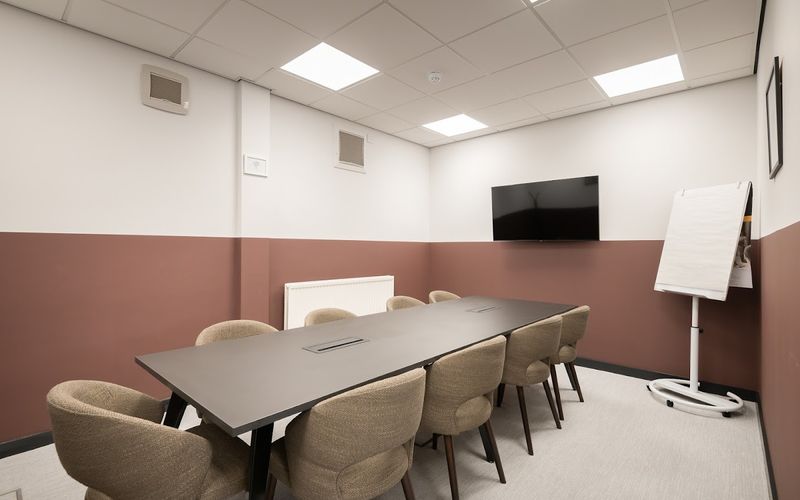
Beck Mill
Reva Syke Road, Clayton
4 DESKS
COWORKING
(B) Park Lane School St • 2 mins walk
(T) Bradford Forster Square • 65 mins walk
£600
/mo
10 other options (1-40 desks)
Enquire
Previous slide
Next slide
Compare
HasleWorks
2-4 Petworth Road, Haslemere
2 DESKS
COWORKING
(B) Town Hall • 2 mins walk
(T) Haslemere • 10 mins walk
£600
/mo
3 other options (1-4 desks)
Enquire
Previous slide
Next slide
Compare
Corn House
Marshgate Lane, London
13 DESKS
COWORKING
(B) Pudding Mill Lane • 5 mins walk
(T) Hackney Wick • 16 mins walk
£2,600
/mo
24 other options (1-85 desks)
Enquire
Previous slide
Next slide
Compare
Riverside Business Centre
Riverside Road, Lowestoft Suffolk
3 DESKS
COWORKING
(B) The Riverside Business Park • 2 mins walk
(T) Lowestoft • 17 mins walk
£217
/mo
6 other options (1-6 desks)
Enquire
Previous slide
Next slide
Compare
Broxhead House
60 Barbados Rd, Bordon
1 DESK
COWORKING
(B) The Phoenix Theatre • 4 mins walk
(T) Bentley • 90 mins walk
£185
/mo
5 other options (1-5 desks)
Enquire
Previous slide
Next slide
Compare
Ingestre Place
44 Ingestre Place, Soho
1 DESK
COWORKING
(B) Trocadero / Haymarket (Stop K) • 4 mins walk
(T) Piccadilly Circus Station • 6 mins walk
£420
/mo
4 other options (1-4 desks)
Enquire
Previous slide
Next slide
Compare
Blake House
18 Blake Street, York
2 DESKS
COWORKING
£245
/mo
3 other options (1-6 desks)
Enquire
Previous slide
Next slide
Compare
Bournemouth Aviation Park West
Target Road, Christchurch
6 DESKS
COWORKING
(B) Commercial Road • 7 mins walk
(T) Pokesdown • 116 mins walk
£540
/mo
20 other options (1-20 desks)
Enquire
Previous slide
Next slide
Compare
60 Derby Road
60 Derby Road, Nottingham
11 DESKS
COWORKING
(B) Cathedral (Stop Y4) • 1 mins walk
(T) Nottingham • 17 mins walk
£1,925
/mo
12 other options (1-12 desks)
Enquire
Previous slide
Next slide
Compare
Runway East Temple Meads
101 Victoria Street, Redcliffe
3 DESKS
COWORKING
(B) Victoria Street (R6) • 1 mins walk
(T) Bristol Temple Meads railway station • 7 mins walk
£1,125
/mo
1 other options (1-3 desks)
Enquire
Previous slide
Next slide
Compare
Park House
Randalls Rd, Leatherhead
1 DESK
COWORKING
(B) Station Road Car Park • 3 mins walk
(T) Leatherhead • 3 mins walk
£199
/mo
12 other options (1-8 desks)
Enquire
Previous slide
Next slide
Compare
Spaces - The Porter Building
1 Brunel Way, Slough
1 DESK
COWORKING
(B) Slough Railway Station • 1 mins walk
(T) Slough • 2 mins walk
£220
/mo
11 other options (1-58 desks)
Enquire
Previous slide
Next slide
Compare
Venture X White City
1 Ariel Way, London
5 DESKS
COWORKING
(B) White City Bus Station (Stop WH) • 2 mins walk
(T) Wood Lane • 3 mins walk
£2,400
/mo
7 other options (1-8 desks)
Enquire
Previous slide
Next slide
Compare
Elder House
Elder Gate, Milton Keynes
1 DESK
COWORKING
(B) Milton Keynes Central • 5 mins walk
(T) Milton Keynes Central railway station • 5 mins walk
£275
/mo
8 other options (1-10 desks)
Enquire
Previous slide
Next slide
Compare
Together Workspace
8 Freckleton Street, Kirkham
1 DESK
COWORKING
(B) Market Square • 2 mins walk
(T) Kirkham & Wesham • 15 mins walk
£192
/mo
1 other options (1-1 desks)
Enquire
Previous slide
Next slide
Compare
Leyton Midland
679 High Road, Leyton
1 DESK
COWORKING
(B) Colchester Road (Stop NB) • 1 mins walk
(T) Leyton Midland Road • 3 mins walk
£280
/mo
5 other options (1-6 desks)
Enquire
Previous slide
Next slide
Compare
The Shepherdess
163 City Road, Hoxton
1 DESK
COWORKING
(B) Moorfields Eye Hospital (Stop P) • 1 mins walk
(T) Old Street • 4 mins walk
£314
/mo
13 other options (1-34 desks)
Enquire
Previous slide
Next slide
Compare
The Cottage
Marine Walk Street, Hythe
3 DESKS
COWORKING
(B) Old Prospect Road • 1 mins walk
(T) Hythe • 12 mins walk
£450
/mo
3 other options (1-3 desks)
Enquire
Previous slide
Next slide
Compare
58 Wood Lane
58 Wood Lane, White City
1 DESK
COWORKING
(B) White City Tube Station • 1 mins walk
(T) Wood Lane • 4 mins walk
£298
/mo
5 other options (1-5 desks)
Enquire
Previous slide
Next slide
Compare
Stratford
11 Burford Road, Greater London
5 DESKS
COWORKING
(B) Carpenters Road / Stratford High Street (Stop J) • 3 mins walk
(T) Stratford • 6 mins walk
£1,275
/mo
7 other options (1-18 desks)
Enquire
Previous slide
Next slide
Compare
Winckley Square
33-34 Winckley Square, Preston
1 DESK
COWORKING
(B) Preston Railway Station • 6 mins walk
(T) Preston • 6 mins walk
£195
/mo
5 other options (1-5 desks)
Enquire
Previous slide
Next slide
Compare
Three Tuns House
109 Borough High Street, Borough
5 DESKS
COWORKING
(B) The Hop Exchange • 3 mins walk
(T) Borough • 5 mins walk
£3,245
/mo
5 other options (1-16 desks)
Enquire
Previous slide
Next slide
Compare
Innovation Connect - Halpern House
Hampshire Terrace, Portamouth
4 DESKS
COWORKING
(B) University of Portsmouth • 2 mins walk
(T) Portsmouth & Southsea • 9 mins walk
£380
/mo
10 other options (1-10 desks)
Enquire
Previous slide
Next slide
Compare
34b York WAY
34b York Way, London
5 DESKS
COWORKING
(B) Wharfdale Road / London Canal Museum • 2 mins walk
(T) King's Cross St. Pancras • 4 mins walk
£1,975
/mo
5 other options (1-5 desks)
Enquire
Previous slide
Next slide
Compare
24 Chiswell Street
24 Chiswell Street, London
20 DESKS
COWORKING
(B) Finsbury Street (Stop S) • 1 mins walk
(T) Moorgate • 4 mins walk
£12,000
/mo
5 other options (1-50 desks)
Enquire
Previous slide
Next slide
10% OFF
Compare
A355 Windsor Drive Beaconsfield Motorway Services Area M40 Junction 2
A355 Windsor Drive Beaconsfield Motorway Services Area M40 Junction 2, Beaconsfield
1 DESK
COWORKING
(B) Beaconsfield Services • 5 mins walk
(T) Seer Green & Jordans • 33 mins walk
£178
/mo
was £198 /mo
Enquire
Previous slide
Next slide
Compare
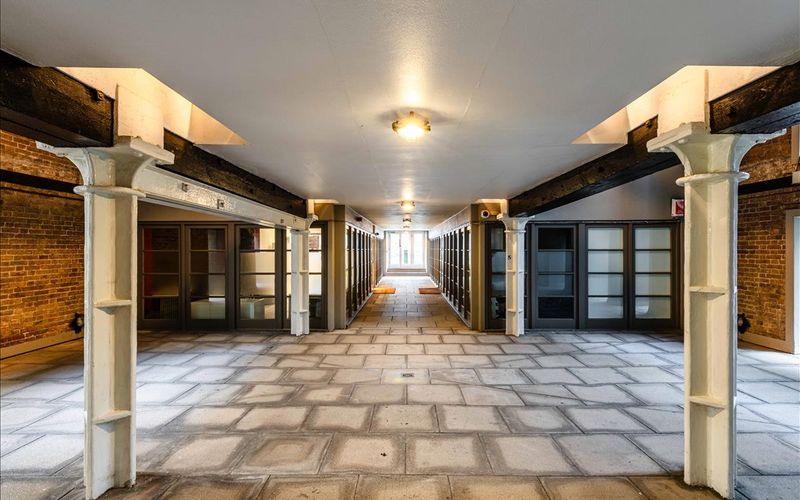
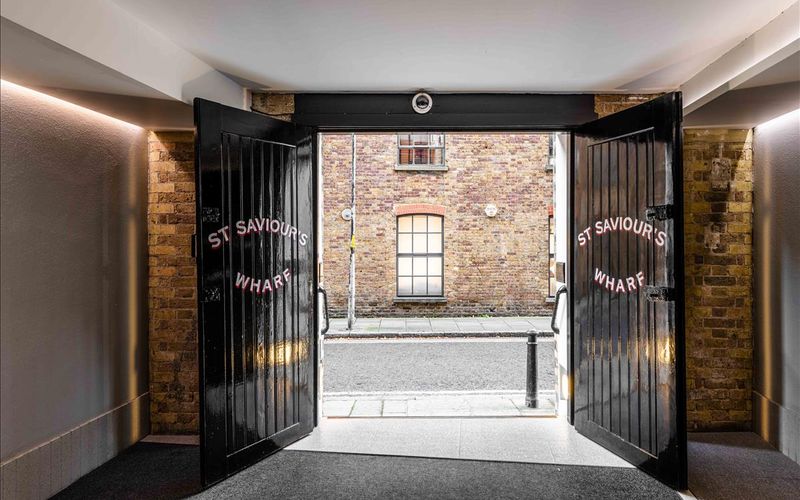
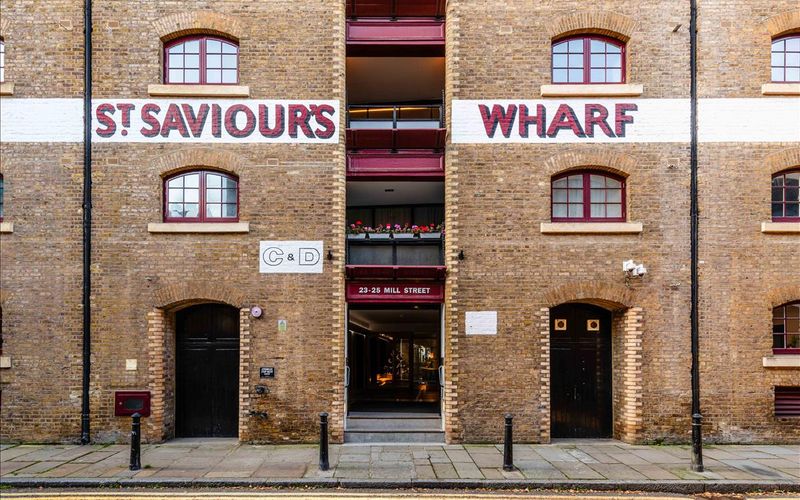
St Saviour's Wharf
23-25 Mill Street, London
1 DESK
COWORKING
(B) Dockhead • 3 mins walk
(T) Bermondsey • 10 mins walk
£350
/mo
9 other options (1-10 desks)
Enquire
Previous slide
Next slide
Compare
Dudley Court South - The Waterfront Business Park - Infinity Serviced Offices
Dudley Court South Level Street, Brierley Hill
1 DESK
COWORKING
(B) Level St • 4 mins walk
(T) Cradley Heath • 40 mins walk
£150
/mo
14 other options (1-28 desks)
Enquire
Previous slide
Next slide
Compare
Elkstone Studios
Elkstone Studios, Elkstone
1 DESK
COWORKING
(B) Newcombe End • 14 mins walk
£149
/mo
1 other options (1-1 desks)
Enquire
Previous slide
Next slide
Compare
Innovation Connect - Halpern House
Hampshire Terrace, Portamouth
6 DESKS
COWORKING
(B) University of Portsmouth • 2 mins walk
(T) Portsmouth & Southsea • 9 mins walk
£570
/mo
10 other options (1-10 desks)
Enquire
Previous
1
2
More pages
11
Next


-England-Hertfordshire-Clarendon-Road-3897642.jpg)


-West-Yorkshire-Wakefield-225-Denby-Dale-Road-3854510.jpg)


-England-East-Parley-Target-Road-3854569.jpg)


-England-Bordon-60-Barbados-RD-4015430.jpg)

-England-Slough-17-23-High-Street-1947287.jpg)
-England-Slough-17-23-High-Street-1947323.jpg)
-England-Slough-17-23-High-Street-1947305.jpg)

-England-Slough-17-23-High-Street-1937389.jpg)


-England-Clayton-Reva-Syke-Road-1377198.jpg)


-England-Haslemere-2-4-Petworth-Road-1971997.jpg)


-England-Haslemere-2-4-Petworth-Road-1971993.jpg)


-London-London-10-Marshgate-Lane-1923500.jpg)
-England-Lowestoft-Suffolk-Riverside-Road-1943943.jpg)
-England-Lowestoft-Suffolk-Riverside-Road-1943941.jpg)
-England-Lowestoft-Suffolk-Riverside-Road-1943944.jpg)
-England-Lowestoft-Suffolk-Riverside-Road-1943940.jpg)
-England-Lowestoft-Suffolk-Riverside-Road-1943942.jpg)
-England-Lowestoft-Suffolk-Riverside-Road-3425398.jpg)


-London-Soho-44-Ingestre-Place-864278.jpg)


-England-York-18-Blake-Street-3836367.jpg)


-Bristol-Redcliffe-101-Victoria-Street-3989264.jpg)


-Leatherhead-Leatherhead-Randalls-Rd-4006220.jpg)
-England-Slough-1-Brunel-Way-1590450.jpg)
-England-Slough-1-Brunel-Way-1590449.jpg)
-England-Slough-1-Brunel-Way-1590448.jpg)
-England-Slough-1-Brunel-Way-1590451.jpg)
-England-Slough-1-Brunel-Way-1590452.jpg)
-England-Slough-1-Brunel-Way-1590447.jpg)
-England-Slough-1-Brunel-Way-1593047.jpg)


-London-London-1-Ariel-Way-1387958.jpg)


-England-Milton-Keynes-Elder-Gate-3821849.jpg)


-England-Leyton-679-High-Road-3978112.jpg)


-England-Hoxton-163-City-Road-3986985.jpg)


-London-White-City-58-Wood-Lane-3967020.jpg)


-England-Greater-London-11-Burford-Road-3963426.jpg)


-London-Borough-109-Borough-High-Street-2204438.jpg)


-England-London-23-25-Mill-Street-3865023.jpg)


-West-Midlands-Brierley-Hill-Level-Street-1353967.jpg)